
Managing Sessions
As a site admin, you can create and edit sessions on the sessions page under the content section within the site Admin. This guide will walk you through the steps to build edit sessions efficiently.
Navigating to the Sessions section of the Site Admin.
Locating the session page in the site admin
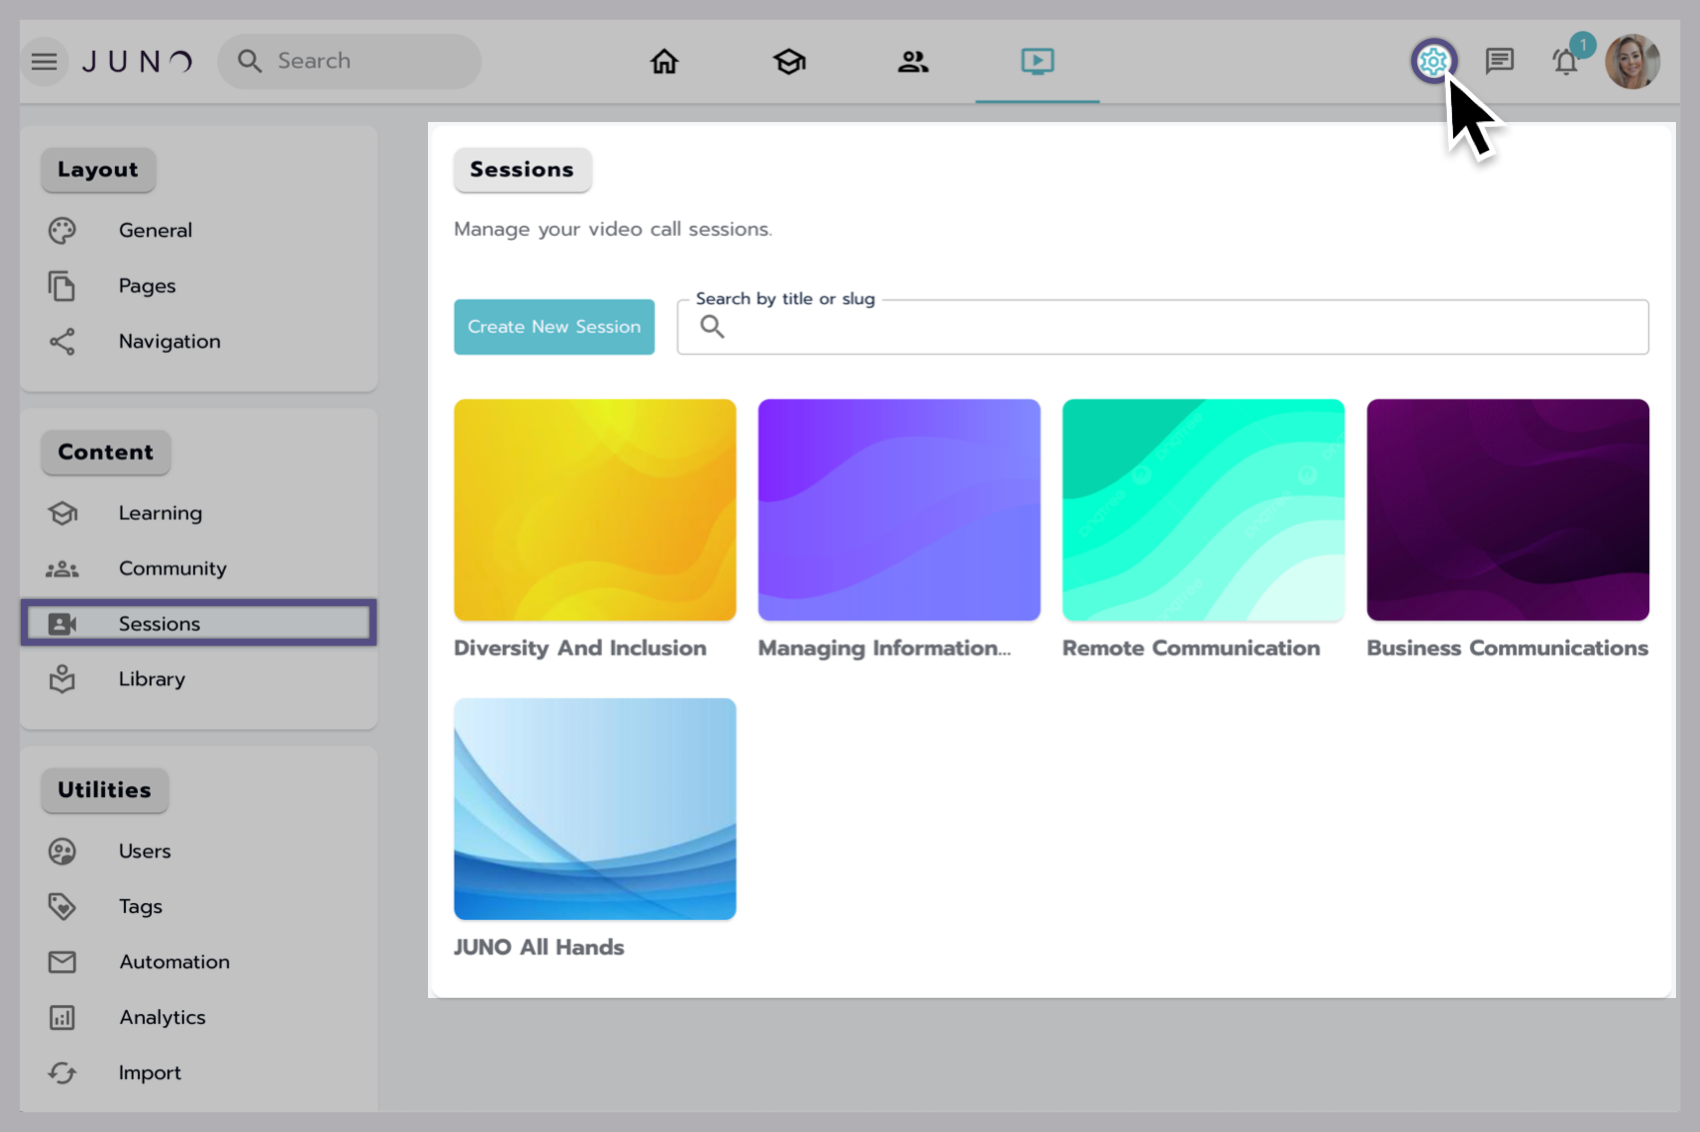
In the admin dashboard, locate the side navigation menu, select Sessions from the navigation items, and you'll be taken to the Session Catalog page.
Search for or create a session.
You can scroll to search or use the search bar to locate and enter a specific session to edit it, or Select Create a Session at the top left corner to create a new session.
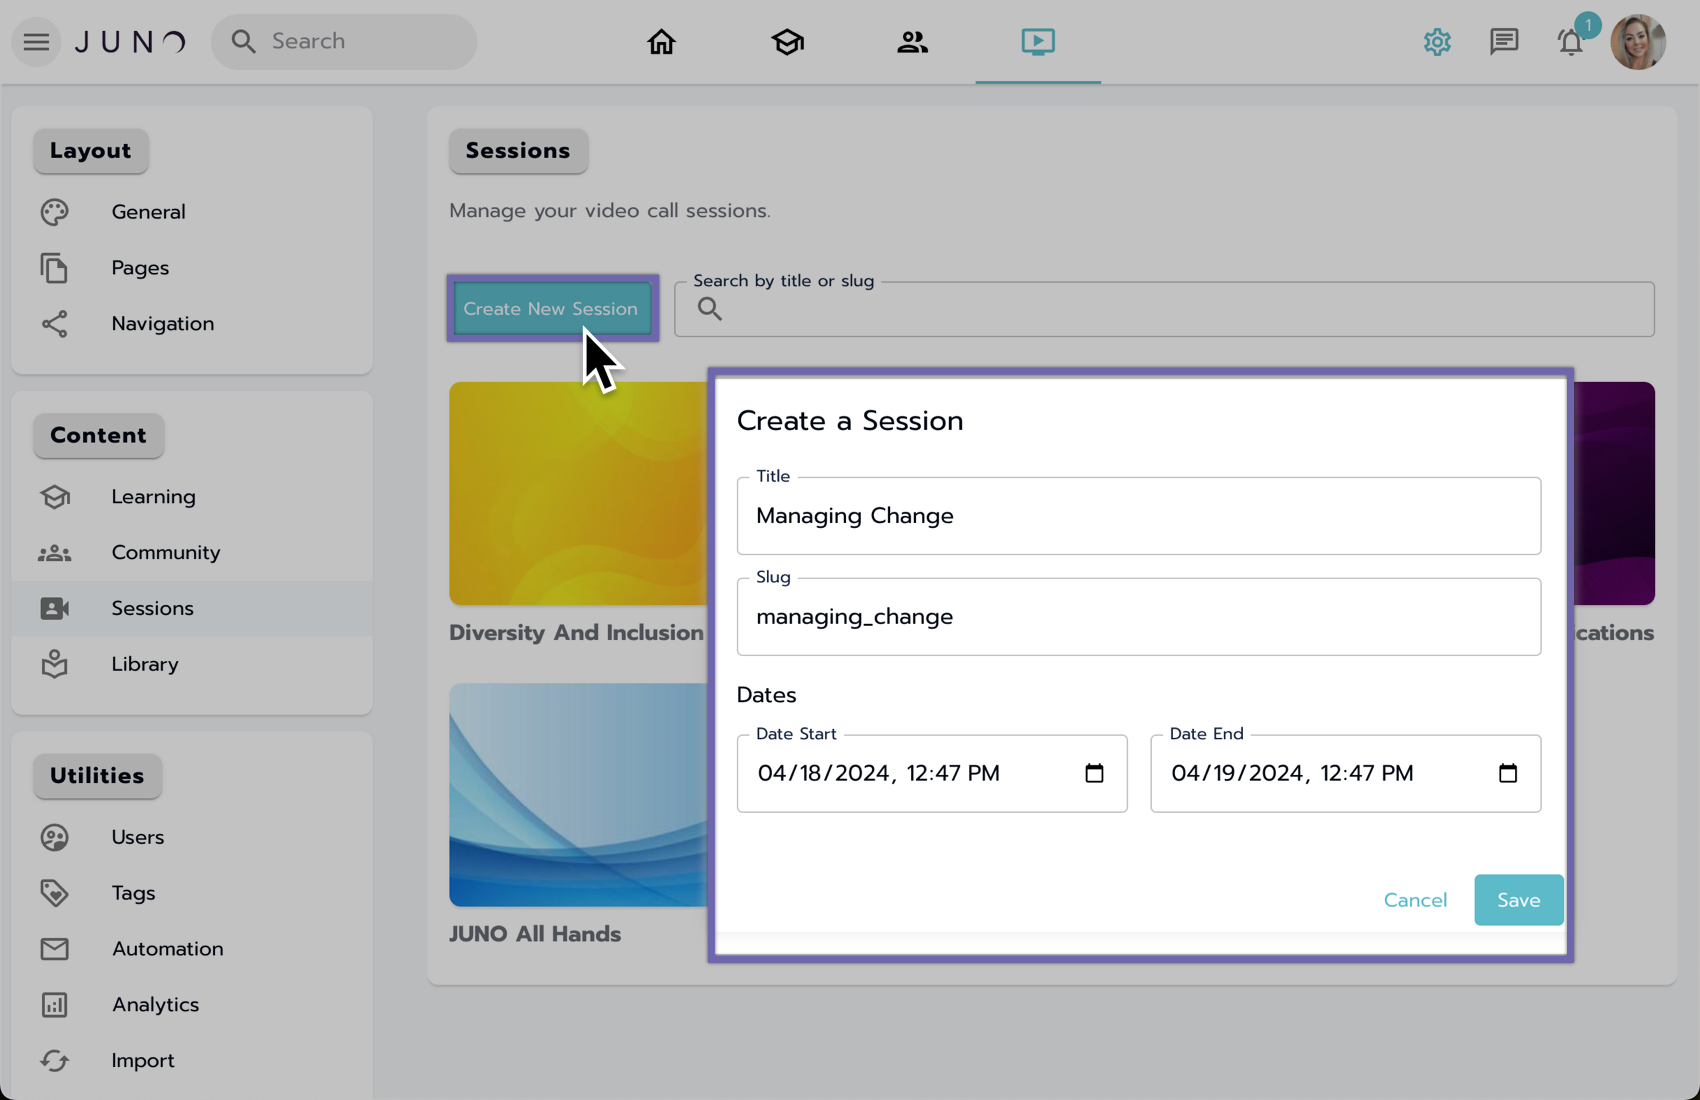
A pop-up window will appear where you can add a title and slug for the new session.
Title: is required (character limit 90).
Slug: is auto-generated from the title and must be unique (character limit 90).
Add the Start Date: The date and time the session will start (required)
Add the End Date: The date and time the session will end (required)
You can select Cancel to exit the popup or Create to create the session.
Creating a new Session.
Editing a session
To edit a session, select the session grid item.
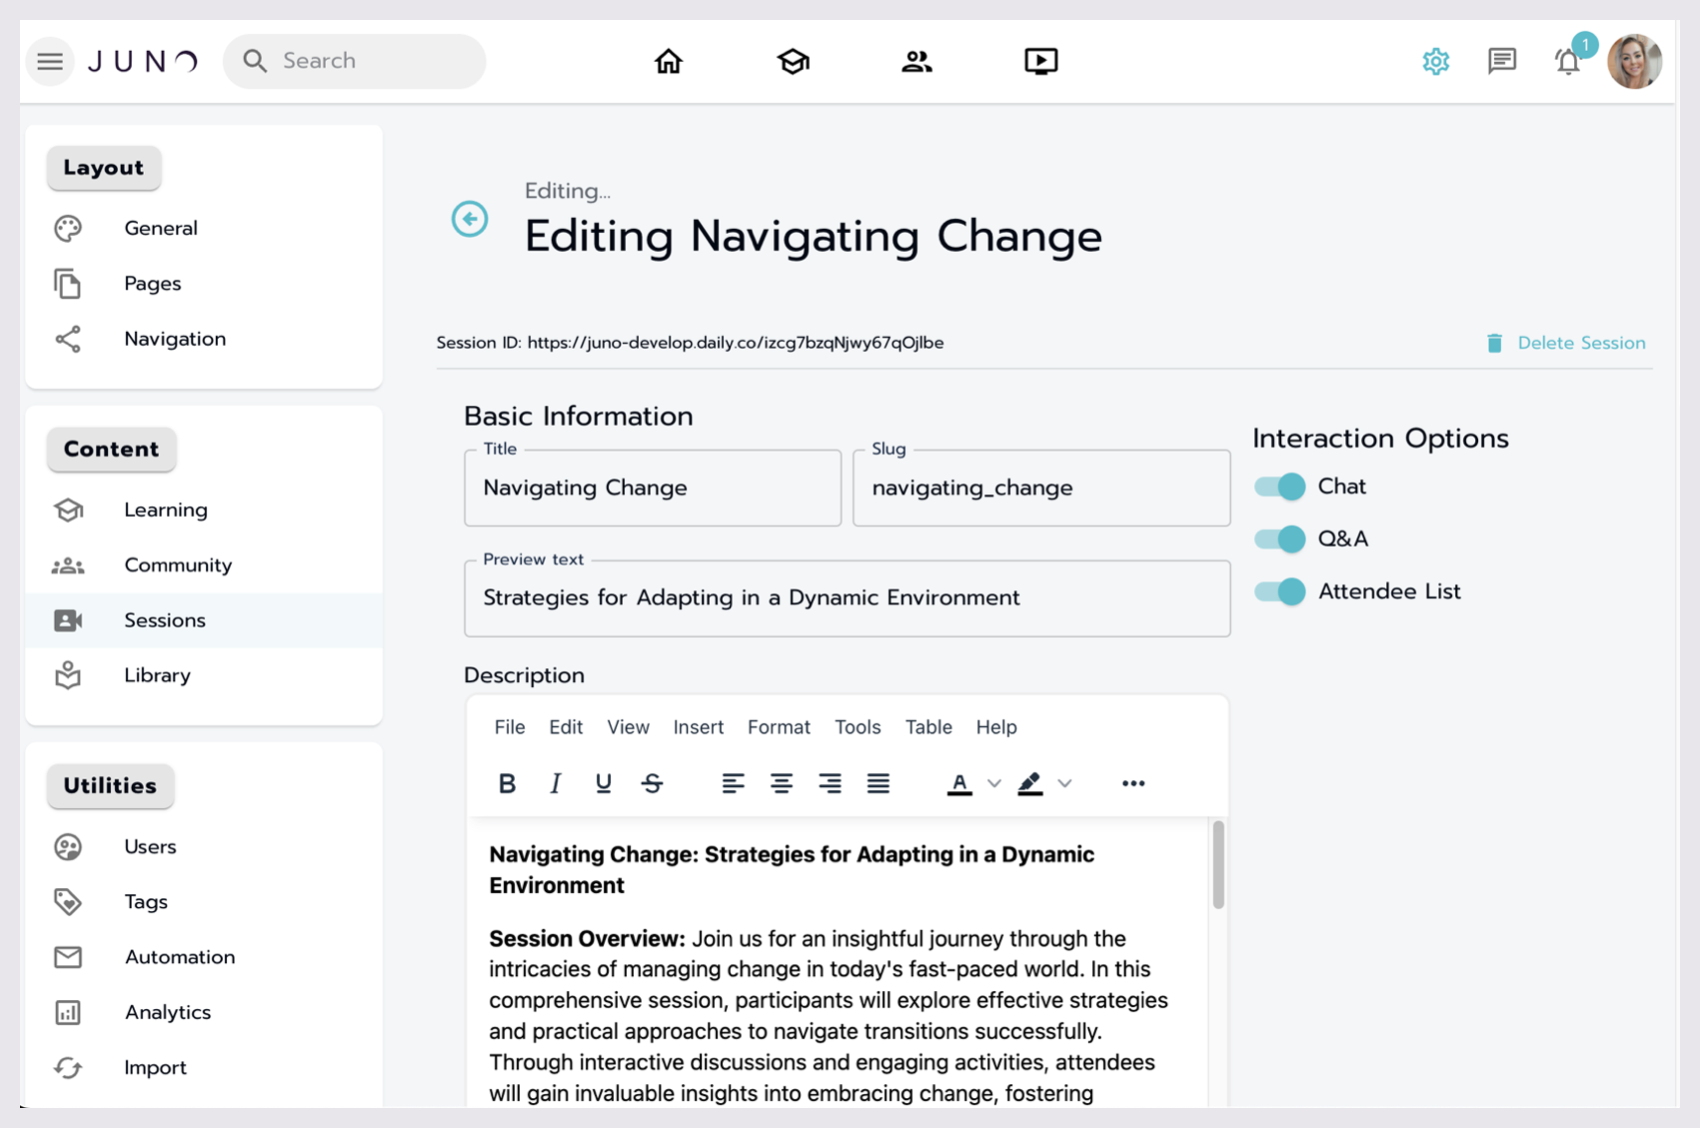
You'll be directed to the session information page, where you can edit various details.
Editable fields include title, slug, preview text, description, and more.
You can save changes or discard them.
Editing a Session in the Site Admin.
Basic information
You can make the session active through a checkbox, which defaults to active (checked).
You can Update the Title, Slug, and Preview text.
You can also Delete the session in this area.
Interaction options
Toggles for Chat, Q&A, and Attendee List.
You can add Access Passes in this section as well.
A note on attaching Access Passes
Only one access pass attached to a product or a URL can be attached to a course at a time.
Description
You can use the text editor to manage the description of the session.
Scheduling
Add Dates and Times for the session.
Start Date and Time: The date and time the session will start.
End Date and Time: The date and time the session will end.
Activation, type, and location
Room type
Choose the room type from the dropdown menu.
Options for Mainstage or Breakout. Learn more about session types.
Display label
Display label: Not required (character limit 30).
Use this field to add a label you can use later to filter sessions through the schedule module. Learn more about the schedule module.
Location
Specify whether the session is in person through a checkbox.
Enter a specific location.
Banner and icon images
Images
Add images to the session, including Icon/list and Banner images.
Accepted file types and recommended image sizes:
‘png,’ ‘jpg,’ ‘jpeg,’ ‘gif,’ ‘webp,’ ‘bmp,’
Moderation
Interaction options
Manage interaction options like Allow raising hands, Auto recording enabled, and Allow watch only through designated toggles.
Specify user roles
Options include specifying user roles and adding presenters, moderators, and attendees.
Attendees sync with front-end users and are indicated by a blinking effect upon save.
Additional tips:
Ensure to adhere to character limits and recommended image sizes for optimal display.
Regularly review and update session information as needed.
Utilize the search functionality to find specific sessions within the catalog quickly.