
Resources tab
Add downloadable files to your exhibitor suite using the editor.
|
|
A video walkthrough of the resources tab.
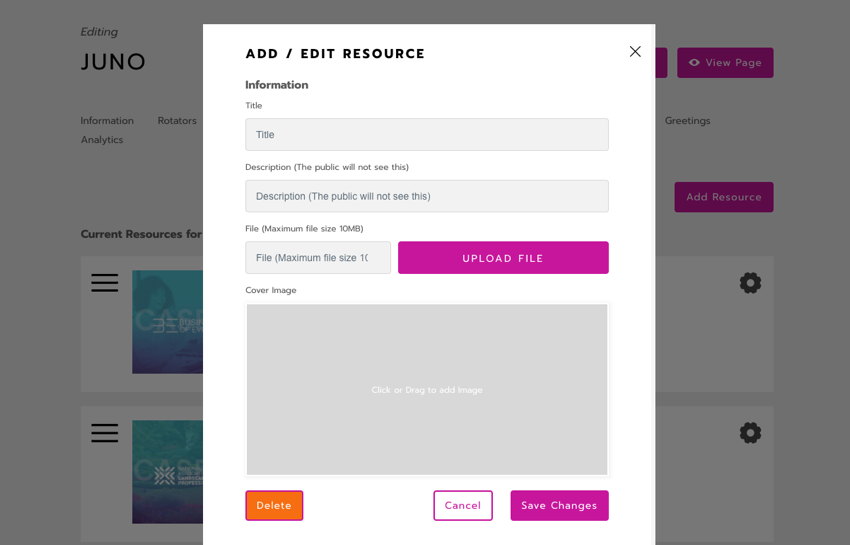
Add a resource
To make content available for download, the “Allow Download” action in the Information tab must be turned on.
Web links can’t be added as resources.
Select Add Resource.
Enter a Title (about 120 characters max). This text will display on your page below the cover image. Note that longer text covers more of the image.
Enter a Description if you want to remind yourself what the file is about. It doesn’t display on your page.
Select Upload File to choose a file from your computer.
A pop-up shows file information. Select Ok to start the upload.
It might take time to upload, depending on the file size. A notification in the corner of your screen tracks the progress. When complete, select Ok to complete the upload. A URL appears in the File textbox.
Upload a Cover Image. This will display on your page with the resource title.
Select Save Changes to close the pop-up.
Select Save Changes at the top of the page. Select View Page to check that all content looks correct.
Edit and delete resources
Reorder items by clicking and dragging the 3 lines icon on the left.

Edit an item by clicking the Gear icon on the right. From there, you can edit its information and settings, or delete it.

Remember to click Save Changes at the top of the page.