
Edit the course home page
This article is about the new JUNO learning management system (LMS). If you don’t see these features on your site, your platform still uses the legacy JUNO courses.
The course home page is where you can introduce a course with images, videos and text. Users see this information before they enroll or start a course.
Before you begin
Open the course editor to follow these instructions.
Remember to click Save at the top of the page before going to a different tab in the editor. Otherwise, you’ll lose your changes.
Who can edit this course information?
About the course home page
The first thing learners see when they open a course is the home page. They can see it before the course starts and even before they enroll. So, it’s a great way to introduce the course and explain why they might want to take it.
The page already includes a list of lesson titles. (Learners can’t open them until they are enrolled and it starts). You can customize it further with images, videos, and text by using the list image, course video, and course body.

An example course home page.
Add a video
If you add a course video, it replaces the icon image at the top of the home page. Note that the icon image is still required because it appears in other locations around the site. The video only appears on the course home page.
To insert a video:
Go to the bottom of the Course Info tab.
Under Video, paste a Course Video URL. It must be an MP4 video URL hosted by the JUNO team in our s3 bucket or hosted externally. At this time, you can’t directly upload videos or use a YouTube, Vimeo, Wistia, or Brightcove link.

Adding a video.
Add body content
You can add additional text, images, and videos to the course body. It displays below the main icon image or video on the course home page.
Videos added to body, description, and/or blurb fields are not tracked in analytics reports.
Go to the Course Info tab to edit the Body field. There are many editing tools, similar to Microsoft Word or Google Docs. Below are instructions for some we find useful.

Editing the course body.
You can insert multiple images from your desktop or from a hosted location.
Small image file sizes help your site load faster. Follow these specifications:
Image file size: Below 200 KB unless otherwise specified.
Image file type: .jpg unless otherwise specified. This helps reduce the file size. If you need a transparent background, use .png.
For images saved on your desktop, drag and drop them directly into the text field.

Dragging and dropping an image from your desktop.
For images you have hosted online, insert their URLs:
Place your cursor where you want to insert the image.
Open the Insert menu.
Select Image.
In the Source field, paste the image URL.
Select Save.

To edit an image after inserting it:
Select the image. You can tell it’s selected because it has a blue outline.
Open the Insert menu.
Select Image to open its settings.
Add an Alternative Description to improve the image’s accessibility. Or resize it by changing the Width and Height.
You can make the size responsive to the screen width so that the image doesn’t get cut off. Type auto into the Height field, and a percentage into the Width field. For example, 100% makes the image fill the full width of the content area, while 50% fills half. Test it out by selecting File > Preview and resizing your browser window.
To reorder images, click and drag them to a different line.
You can insert multiple videos hosted by JUNO in our s3 bucket or you can embed videos hosted on YouTube, Vimeo, Wistia, or Brightcove.
Videos added to body, description, and/or blurb fields are not tracked in analytics reports.
Check your video’s privacy settings to make sure attendees will be able to view your video. Also note that regional laws block some video platforms. Learn more about video privacy settings.
Place your cursor where you want to insert the video.
Open the Insert menu.
Select Media.
To add an m3u8 link hosted by JUNO, select General and paste it into the Source field.
Or to embed a YouTube, Vimeo, Wistia, or Brightcove video, select Embed and paste the embed code. That code looks something like this:
<iframe width="560" height="315" src="https://www.youtube.com/embed/n61...</iframe>
Select Save.

Inserting a video.
To reorder videos, click and drag them to a different line.
Copy the URL of the page you want to link to.
Highlight text in the text field.
Open the Insert menu.
Select Link.
Paste the URL.
Select Save.

Adding a link.
To edit an existing link, right-click it and select Link. To remove an existing link, right-click it and select Remove link.
Anchors let you create links to lines in the middle of your page. Here’s how:
Place your cursor on the line you want to link to.
Open the Insert menu.
Select Anchor.
Give it an ID so that you can identify it later. For example, you might use the section heading name or the subject of the paragraph.

Insert a link somewhere else on the page. Instead of adding a URL, select the Anchor from the dropdown menu. Now that link will direct people to the anchor.

Make your page easy to read and scan by using pre-sized section headings.
Type a heading in the text field.
Place your cursor on the same line.
Open the Format menu.
Select Blocks.
Select a heading size. Your text automatically formats into that heading.

Adding a section heading.
When you copy and paste text from another text editing program or website, it sometimes brings along unwanted text formatting from its original location. There are two ways to fix this:
Before pasting the text, open the Edit menu and select Paste as text. A checkmark appears, indicating that the setting is turned on. Now, select Paste to paste your text, free of formatting.
Or after pasting the text, highlight it and open the Format menu. Select Clear formatting. This doesn’t clear some types of formatting, so it may be less reliable than the first option.
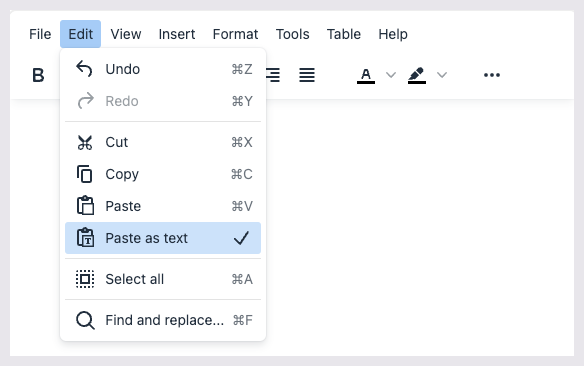
Turning on the Paste as text setting.
Add downloadable resources
Resources are an additional option for the course home page. See Edit course resources.
Related articles
- Creating or importing learning packaged courses
- Create, add and manage prerequisites
- Add required or granted prerequisites
- Attaching access passes to courses
- Attaching an education credit to a course in the course editor
- Education credits and course information pages
- Attaching a certificate to an education credit
- Creating Education Credits (EC) in Das Admin
- Attaching an access pass to an education credit
- Add instructors to a course
- Add instructors to a course
- Edit course resources
- Enroll, remove enrollment, add to waitlist, and indicate course completion status for learners.
- Edit course enrollment settings
- Edit course resources