
Navigation
This guide will walk you through customizing the navigation items in your site's header and side navigation sections.
Overview of the navigation page | Customizing the header navigation | Customizing the quick links navigation | Creating new navigation items | Additional tips
Overview of the navigation page
The navigation page has two sections: the Header Nav and Quick Links.
Header Nav: Links edited or created here will reflect on your site's Header Navigation. The Save button displays real-time updates.
Quick Links: Links edited or created here are reflected on your site's Side Navigation menu. Real-time updates can be viewed under What Users Will See.
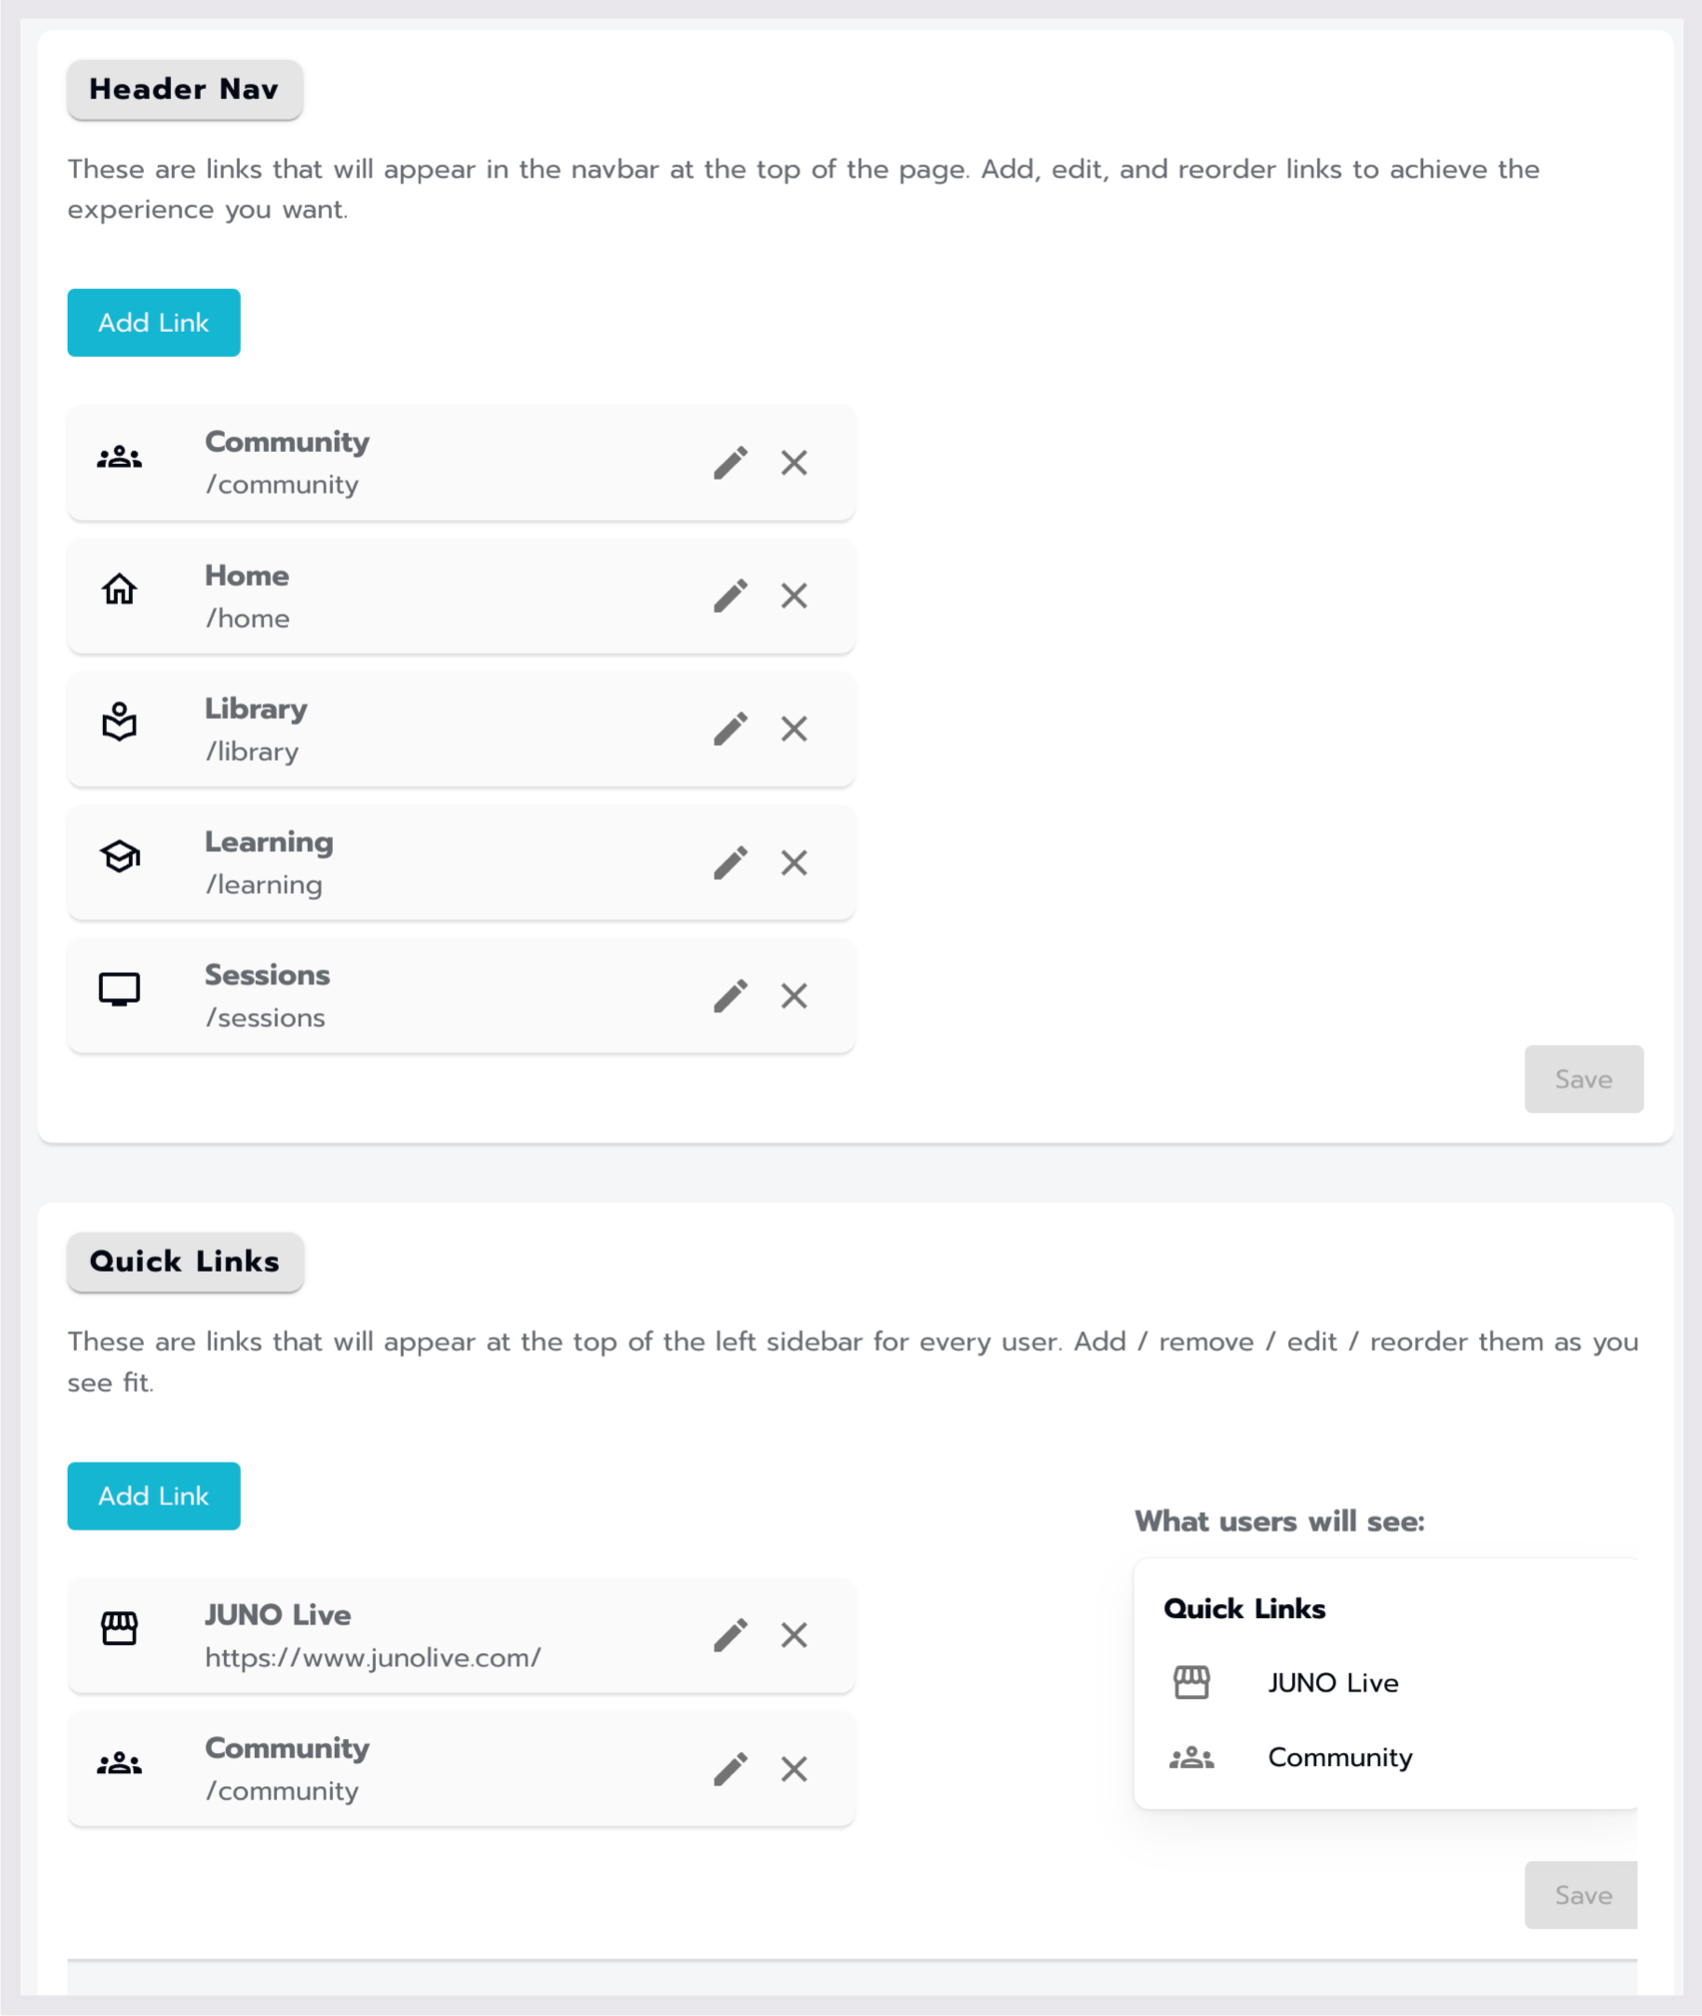
The Navigation section in the Site Admin.
Customizing the header navigation
Locate the Header Nav section on the navigation page.
Here, you'll find default navigation links. Here, you can use the Add Link button to create new links, edit existing navigation links through the pencil icons, adjust their order by dragging and dropping, or delete navigation links using the X icons.
Customizing the quick links navigation
Locate the Quick Links section on the navigation page.
Like the Header Nav section, you can create new links using the Add Link button, edit existing navigation links through the pencil icons, adjust their order by dragging and dropping, or delete navigation links using the X icons.
Creating new navigation items
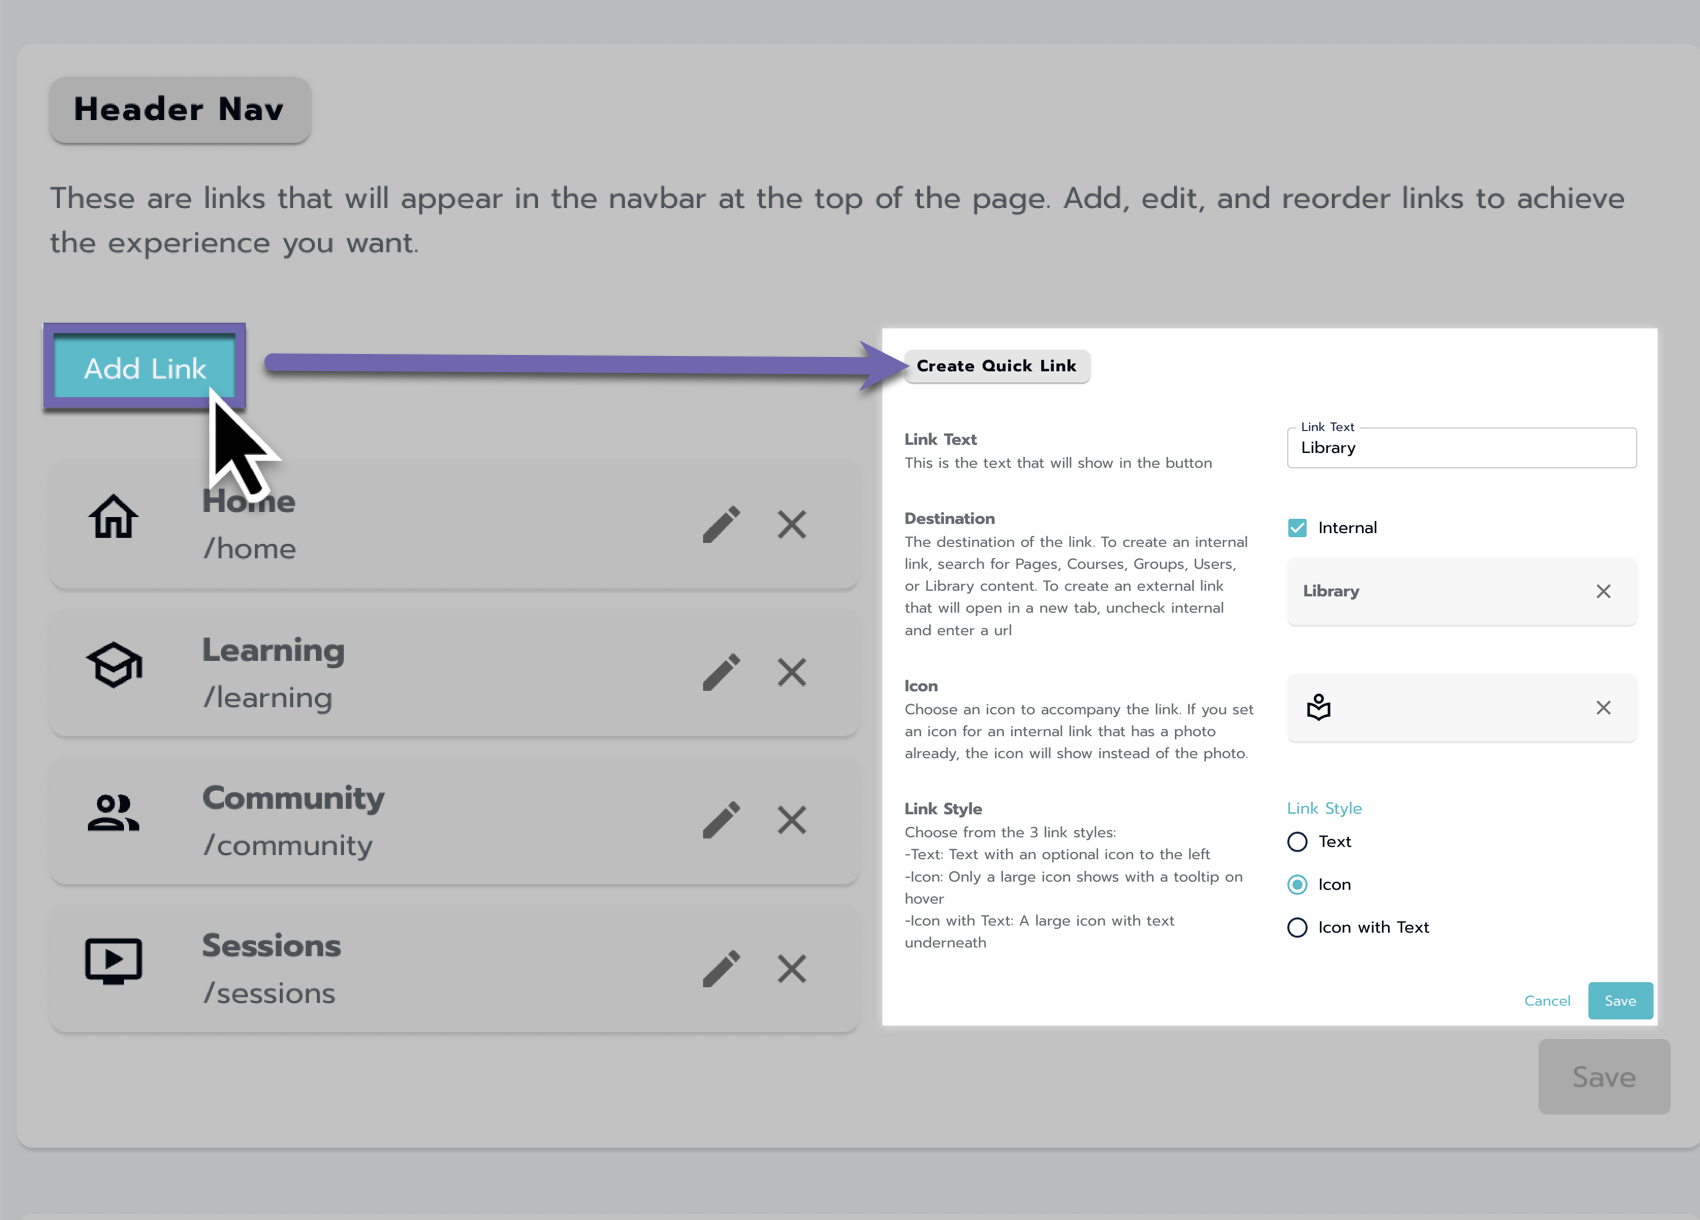
Creating a new Navigation Link.
Select the Add Link button in the section you want to create a new link within.
Header Nav
Quick Links
Fill out the required fields in the Create Quick Link window, including Link Text, Destination, Icon, and Link Style.
Link Text: This text will show on the button or as a tooltip and is required.
Destination with a Checkbox to designate internal (default on): The link's destination. Search for Pages, Courses, Groups, or Library content to create an internal link.
To create an External link that will open in a new tab, uncheck the internal box and add a valid URL.
Icon: Choose an icon to accompany the link.
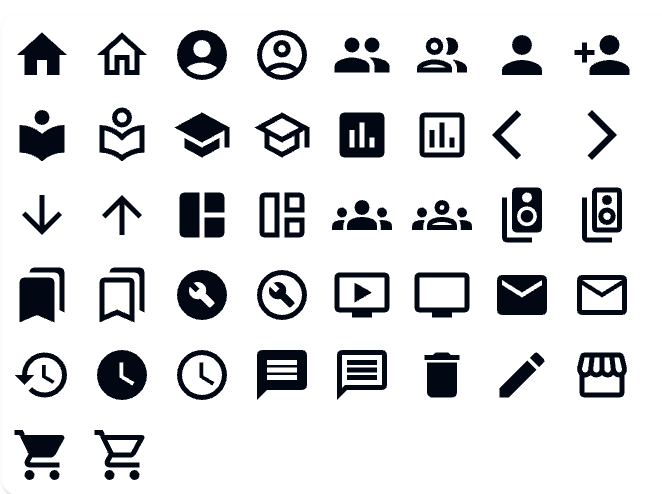
Showing the list of icons available.
Link Style: Choose from the 3 link styles:
Text: Text with an optional icon to the left.
Icon: Only a large icon shows with a tooltip when hovering.
Icon with Text: A large icon with text underneath
Select Create to finish setting up the new header nav item.
After making changes, select the Save button to update the respective navigation section.
Additional tips
Regularly review and update your navigation to ensure alignment with your site's content and objectives.
Test the navigation on different devices for optimal user experience.
Contact your JUNO team representative for assistance with any navigation issues or questions.
Related Articles
- Attaching access passes to content around the site.
- Creating and managing Access Passes
- Add and update users
- Using the utilities section of the site
- Library pages
- Managing Sessions
- Navigation
- Create and edit content on your site
- Grid modules
- Directory modules
- Rotator modules
- Getting started with the site admin
- Pages
- General settings
- Community